Intex Sand Filter Pump Instructions: A Comprehensive Guide
Navigating pool maintenance can be simplified with a clear understanding of your Intex sand filter pump; this guide offers detailed troubleshooting steps and preventative measures․
Understanding Your Intex Sand Filter Pump System
Your Intex sand filter pump is the heart of a clean and enjoyable pool experience, efficiently circulating and filtering water․ This system utilizes a multi-port valve to direct water flow for various functions – filtering, backwashing, rinsing, waste, and recirculating․ The pump draws water from the pool, pushing it through the filter tank filled with specialized sand, which traps debris and impurities․
Understanding the interplay between the pump, filter, and valve is crucial for optimal performance․ Proper operation ensures crystal-clear water and extends the life of your equipment․ Regular inspection and maintenance, as outlined in this guide, will help you proactively address potential issues and maintain a healthy swimming environment․ Familiarize yourself with each component’s role for effective troubleshooting․
Components of the System
An Intex sand filter system comprises several key components working in harmony․ These include the pump motor, responsible for water circulation; the filter tank, housing the filtration sand; and the multi-port valve, controlling water flow direction․ Essential parts also encompass the pump basket, catching large debris, and the pressure gauge, monitoring filter status․
Don’t overlook the center hub pipe, crucial for internal water distribution, and the O-rings, ensuring watertight seals․ Each component plays a vital role in maintaining water clarity and system efficiency․ Regular inspection of these parts – valves, O-rings, and the pump basket – is paramount for preventing leaks and ensuring optimal performance․ Understanding each component’s function facilitates effective maintenance and troubleshooting․
Pump and Filter Connection
Proper connection between the pump and filter is critical for efficient operation․ Begin by ensuring all connections are clean and free of debris․ Carefully align the pump outlet with the filter inlet, utilizing appropriate hose clamps to secure the connection․ It’s vital to avoid over-tightening, which can damage the fittings․
Inspect the O-rings on both the pump and filter connections for any signs of wear or damage; replace them if necessary to prevent leaks․ Double-check that the multi-port valve is correctly positioned before initiating the connection․ A secure and leak-proof connection is fundamental for maintaining water pressure and preventing system failures․ Always prioritize a tight, yet gentle, assembly․

Initial Setup and Installation
Begin with careful preparation, ensuring the filter is level and positioned correctly; proper installation is key for optimal performance and longevity of your system․
Filling the Filter with Sand
Proper sand filling is crucial for effective filtration․ Begin by removing the filter’s top diffuser and carefully pouring in the appropriate grade and quantity of sand, typically #20 silica sand, following your pump’s specifications․ Avoid clumping by gently cascading the sand into the tank, ensuring even distribution․
Do not overfill; leave sufficient space for water․ After adding the sand, replace the diffuser and ensure a tight seal․ A common issue is forgetting to fill the filter with water after adding the sand, which hinders priming․ Remember, a completely full pool aids in this process, removing air from the filter system for efficient operation․ This initial step sets the foundation for a clean and enjoyable swimming experience․
Priming the Pump
Priming eliminates air from the pump and filter lines, essential for initiating water flow․ Begin by ensuring the filter is filled with water, as a dry filter prevents proper priming․ Open the air relief valve located on top of the filter housing․ Turn on the pump; it may initially run dry and make noise․
Monitor the pressure gauge; as the pump primes, water will displace the air, and the pressure will gradually increase․ Once a steady water flow emerges from the air relief valve, close it securely․ If the pump fails to prime after several minutes, turn it off and re-check for leaks or obstructions․ A completely full pool significantly aids the priming process, ensuring efficient operation and preventing pump damage․
Connecting to Power
Prioritize electrical safety when connecting your Intex sand filter pump․ Ensure the power outlet is a grounded, three-prong outlet and matches the pump’s voltage requirements․ Never use extension cords, as they can reduce voltage and pose a safety hazard․ A dedicated circuit is highly recommended to prevent overloading․
Before plugging in, verify the pump’s motor is dry and all connections are secure․ Use a Ground Fault Circuit Interrupter (GFCI) outlet for added protection against electrical shock․ Once connected, briefly test the pump to confirm proper operation․ Regularly inspect the power cord for any damage, and immediately discontinue use if fraying or cracks are observed․ Always disconnect power before performing any maintenance․

Routine Maintenance
Consistent upkeep is vital for optimal performance; regular backwashing, basket cleaning, and scheduled sand replacement will extend your Intex pump’s lifespan considerably․
Regular Filter Backwashing
Backwashing is crucial for maintaining a clean and efficient filtration system․ Over time, debris accumulates within the sand, reducing water flow and filtration effectiveness․ To backwash, turn the multiport valve to the “Backwash” position․ Ensure the pump is running and operate for approximately 2-3 minutes, or until the water in the sight glass clears․
Next, turn the pump off and set the valve to the “Rinse” position, running it for about 30-60 seconds to resettle the sand bed․ Finally, return the valve to the “Filter” position and resume normal operation․ The frequency of backwashing depends on pool usage and environmental factors, but generally, it should be done when the filter pressure increases by 8-10 PSI above the clean starting pressure․ Consistent backwashing ensures optimal water clarity and prolongs the life of your filter sand․
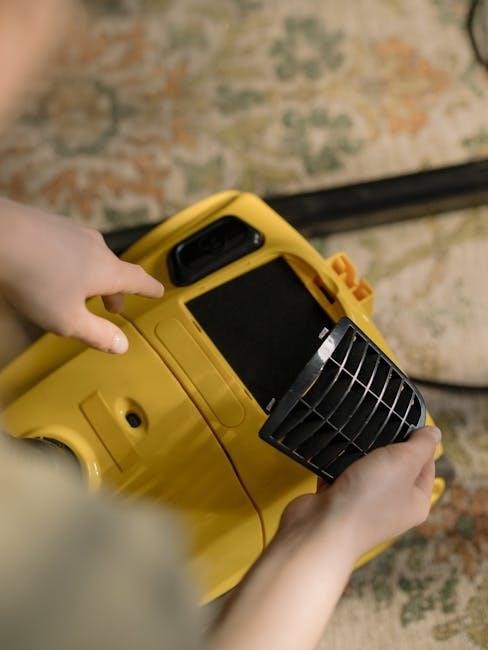
Cleaning the Pump Basket
Regularly cleaning the pump basket is a simple yet vital maintenance task․ Debris like leaves, hair, and insects can quickly accumulate, restricting water flow and potentially damaging the pump motor․ Before cleaning, always turn off the pump and disconnect the power source for safety․
Locate the pump basket housing, typically a clear plastic cylinder, and carefully remove the lid․ Empty the basket of any collected debris․ Inspect the basket for cracks or damage and replace if necessary․ Reassemble the lid, ensuring a secure and watertight seal․ A clean pump basket promotes efficient water circulation and prevents unnecessary strain on the pump, extending its lifespan and maintaining optimal pool performance․ Check this at least weekly during peak usage․
Sand Replacement Schedule
Maintaining optimal filtration requires periodic sand replacement in your Intex sand filter pump․ Over time, the sand becomes rounded and loses its ability to effectively trap fine particles, reducing filtration efficiency․ Generally, sand should be completely replaced every 3 to 5 years, depending on pool usage and water quality․
Signs indicating the need for replacement include consistently cloudy water despite regular backwashing, reduced water flow, or the presence of debris in the pool․ When replacing, use the correct grade of sand specified in your pump’s manual – typically #20 silica sand․ Ensure thorough rinsing before adding the new sand to the filter․ Following this schedule ensures consistently clean and clear pool water, protecting your pump and enhancing your swimming experience․

Troubleshooting Common Issues
Addressing pump problems swiftly is crucial for uninterrupted pool enjoyment; common issues include priming difficulties, reduced flow, humming without starting, and frustrating leaks․
Pump Not Priming

A pump failing to prime is a frequent frustration for Intex sand filter users․ First, ensure the filter is filled with water after adding sand – air pockets prevent proper operation․ Verify the pool water level is sufficiently high; the pump needs a consistent water supply․
Check for any obstructions in the pump basket or suction lines․ Air leaks in the plumbing, particularly around connections and the pump lid O-ring, can also cause priming issues․ Carefully inspect and tighten all fittings․
If the pump still won’t prime, manually fill the pump housing with water using the designated fill port․ Run the pump briefly to see if it establishes prime․ Remember to disconnect power before any manual intervention! A completely full pool is also essential for successful priming․
Low Water Flow
Experiencing reduced water flow despite a running pump often indicates a blockage or restriction within the system․ The most common solution is backwashing the filter; accumulated debris significantly reduces flow rate․ Regularly scheduled backwashing is crucial for maintaining optimal performance․
Inspect the pump basket for leaves, dirt, and other obstructions․ A clogged basket severely limits water intake․ Also, examine the intake and outlet valves for any blockages or partially closed positions․ Ensure all valves are fully open;
If backwashing and basket cleaning don’t resolve the issue, a partially clogged filter sand bed might be the culprit․ In severe cases, sand replacement may be necessary․ Remember to always disconnect power before inspecting or cleaning any part of the pump or filter system․
Pump Humming But Not Starting
A humming sound without pump operation typically suggests an electrical issue or a mechanical obstruction․ First, verify the power supply to the pump; ensure the outlet is functioning correctly and the GFCI hasn’t tripped․ Check the pump’s power cord for any damage or breaks․
The most frequent cause is a jammed impeller․ Disconnect power immediately and access the impeller housing (refer to your pump’s manual for specific instructions)․ Carefully remove any debris – leaves, twigs, or small objects – that may be blocking the impeller’s rotation․
If the impeller spins freely but the pump still hums, the motor capacitor might be faulty․ Replacing the capacitor often resolves this issue, but it’s recommended to consult a qualified electrician for this repair․
Leaks Around Filter Connections
Leaks at the filter connections are common and often easily resolved․ Begin by visually inspecting all threaded connections – where hoses attach to the filter housing, valves, and pump․ Tighten these connections carefully, but avoid over-tightening, which can damage the plastic components․
Pay close attention to the clear basket lid O-ring; a damaged or misaligned O-ring is a frequent culprit․ Inspect the O-ring for cracks, tears, or debris․ Clean the O-ring and the lid’s seating surface thoroughly․ If damaged, replace the O-ring with a new one of the correct size․
Also, examine the valves for any cracks or wear․ Ensure they are properly seated and secured․ Applying a small amount of silicone-based lubricant to the O-rings can help create a better seal and prevent future leaks․
Advanced Troubleshooting
Persistent issues like high pressure, sand in the pool, or pump overheating require detailed investigation and potentially component replacement for optimal performance․
High Pressure in the Filter
Experiencing unusually high pressure within your Intex sand filter system indicates a potential blockage somewhere in the circulation pathway․ Immediately shut down the pump to prevent damage․ The most common culprit is a clogged filter – thoroughly backwash the system following the manufacturer’s instructions․ If backwashing doesn’t resolve the issue, inspect the pump basket for debris accumulation and clean it meticulously․
Furthermore, examine the intake and outlet pipes for any obstructions, such as leaves or small objects․ A partially closed valve can also contribute to increased pressure; ensure all valves are fully open․ If the pressure remains elevated after these checks, a more serious internal issue within the filter or pump may exist, requiring professional assessment and potential component replacement․ Ignoring high pressure can lead to catastrophic failure․
Sand in the Pool Water
Discovering sand in your pool is often a sign of issues within the filter itself․ Typically, this occurs due to a compromised lateral – the internal distribution system within the filter tank․ Inspect the laterals for cracks or damage; these are crucial for evenly distributing water flow and preventing sand from escaping․ A faulty or improperly sealed multiport valve can also allow sand to bypass the filtration process and enter the pool․
Backwashing can sometimes temporarily alleviate the problem, but if sand continues to appear, lateral replacement is usually necessary․ Ensure the sand grade is appropriate for your filter; using the wrong type can contribute to leakage․ Regularly inspect the center hub pipe for damage, as this component also plays a role in maintaining filter integrity and preventing sand migration․
Pump Overheating
A pump overheating indicates a significant strain on the motor, potentially leading to damage if left unaddressed․ The most common cause is restricted water flow, often due to a clogged pump basket or a dirty filter․ Regularly cleaning the pump basket and performing routine backwashing are essential preventative measures․ Insufficient water levels in the pool can also cause the pump to run dry and overheat․
Inspect the impeller for debris or damage, as a malfunctioning impeller reduces water circulation․ Ensure proper ventilation around the pump motor; avoid enclosing it in tight spaces․ If overheating persists after addressing these issues, a motor capacitor or the motor itself may be failing, requiring professional repair or replacement․ Always disconnect power before inspecting the pump․
Safety Precautions
Prioritize safety by disconnecting power before maintenance, understanding operational limits, and properly winterizing the system to prevent damage and ensure longevity․
Electrical Safety
Always disconnect the Intex sand filter pump from its power source before performing any maintenance, inspection, or troubleshooting․ Never operate the pump with a damaged power cord; replace it immediately with a manufacturer-approved replacement․ Ensure the electrical outlet is properly grounded and protected by a Ground Fault Circuit Interrupter (GFCI) to prevent electrical shock․
Avoid using extension cords whenever possible; if necessary, use a heavy-duty, outdoor-rated extension cord․ Never submerge the pump or power cord in water․ Regularly inspect the power cord for any signs of wear or damage․ If you are uncomfortable working with electrical components, consult a qualified electrician․ Remember, water and electricity are a dangerous combination, so prioritize safety at all times when dealing with your pool pump․
Filter System Operation Limits
Understanding operational boundaries is crucial for longevity․ Do not operate the Intex sand filter pump outside of its specified voltage range, as this can cause damage or create a safety hazard․ The pump is designed for continuous operation, but prolonged use at extremely high temperatures should be avoided․ Regularly monitor the filter pressure; exceeding the maximum recommended pressure can damage the filter tank and components․
Avoid running the pump dry, as this can burn out the impeller․ The system is intended for residential pool use only; commercial applications are not supported․ Always adhere to the manufacturer’s guidelines regarding water temperature and chemical balance․ Ignoring these limits can void your warranty and compromise the system’s performance․
Winterizing Your Intex Sand Filter Pump
Proper winterization prevents damage from freezing temperatures․ First, thoroughly drain all water from the pump, filter tank, and connecting pipes․ Remove the drain plug on the filter tank and allow it to drain completely․ Disconnect the pump from the filter and bring it indoors for storage in a dry location․ Clean the pump basket and inspect O-rings for cracks or damage, replacing them if necessary․
Blow out the plumbing lines with compressed air to remove any remaining water․ Plug all open connections to prevent debris from entering․ Store the filter tank upright to prevent water accumulation․ Consider using a winterizing chemical to protect the plumbing from corrosion․ Reassemble in the spring and prime before use․
Detailed Component Inspection
Regular inspection is key; carefully examine O-rings, valves, and the center hub pipe for wear, damage, or misalignment to ensure optimal performance․
O-Ring Inspection and Replacement
O-rings are crucial for maintaining watertight seals within your Intex sand filter pump system, particularly around the clear basket lid and valve connections․ Regularly inspect these rubber components for cracks, tears, or general deterioration․ A damaged O-ring will inevitably lead to leaks, reducing pump efficiency and potentially causing damage to surrounding components․
To inspect, carefully remove the component (lid or valve) and visually assess the O-ring․ If damage is present, replacement is necessary․ Ensure you obtain the correct size O-ring for your specific Intex model․ Lubricate the new O-ring with a silicone-based lubricant before installation to facilitate a proper seal and prevent future damage․ Avoid using petroleum-based lubricants, as they can degrade the rubber․ Tighten connections securely, but avoid over-tightening, which can also damage the O-ring․
Valve Inspection and Maintenance
Regular valve inspection is vital for optimal Intex sand filter pump performance․ Valves control water flow direction during filtration, backwashing, and rinsing cycles․ Inspect valves for cracks, brittleness, or any signs of wear and tear․ Pay close attention to the valve’s internal components, ensuring they move freely and seal properly․
Debris can accumulate within the valve body, hindering its function․ Disassemble the valve carefully, cleaning all parts with a mild detergent and water․ Reassemble, ensuring all components are correctly aligned․ If a valve is damaged or worn, replacement is recommended․ A malfunctioning valve can cause reduced water flow, improper backwashing, or even complete system failure․ Proper valve maintenance extends the lifespan of your filter pump and ensures efficient pool operation․
Center Hub Pipe Examination
The center hub pipe, a crucial component, often causes pump failures if neglected․ Thoroughly examine the pipe for cracks, especially at the base where it connects to the filter housing․ A common issue involves the pipe becoming detached, preventing proper water circulation and causing the pump to hum without starting․
Inspect the O-rings and seals on the center hub pipe for damage or deterioration․ These seals maintain a watertight connection․ If the pipe is loose, tighten the connections carefully, avoiding over-tightening which can cause further damage․ Replacement of the center hub pipe, along with its associated seals, is often necessary if cracks are present or the pipe is severely damaged․ Addressing this issue promptly restores pump functionality and prevents potential leaks․