Welcome to the Singer Sewing Machine User Guide. This guide helps you understand and utilize your machine effectively. Learn about setup, maintenance, basic operations, troubleshooting, and accessories. Designed for both beginners and experienced sewers, it ensures you get the most out of your Singer machine.
1.1 Understanding the Importance of Proper Machine Setup
Proper machine setup is essential for optimal performance and longevity of your Singer sewing machine. Incorrect setup can lead to issues like thread tangling, uneven stitches, or even machine damage. Always follow the manual for threading, bobbin installation, and presser foot alignment. Regularly checking and maintaining these elements ensures smooth operation. Proper setup also prevents common problems like skipped stitches or thread tension imbalances. By adhering to setup guidelines, you can achieve professional results and extend your machine’s lifespan.
1.2 Key Features of Singer Sewing Machines
Singer sewing machines are renowned for their versatility and durability. They offer a wide range of stitch options, including straight, zigzag, and decorative stitches, catering to various sewing needs. Many models feature automatic needle threaders, built-in stitch guides, and adjustable stitch length and width. Heavy-duty constructions ensure robust performance, while optional accessories like specialized presser feet enhance functionality. These machines are designed to handle fabrics from delicate silks to thick denim, making them ideal for both beginners and experienced sewers. Their user-friendly interfaces and advanced features promote creativity and precision in every project.
1.3 Safety Precautions for Operating the Machine
Always prioritize safety when using your Singer sewing machine; Keep loose clothing and long hair tied back, and avoid sewing over pins or small objects that could cause damage. Ensure the presser foot is in the down position before sewing to prevent thread tangling or fabric slipping. Use only Singer-approved needles and accessories to maintain optimal performance. Keep children away from the machine while in operation. Unplug the machine during maintenance or when not in use. Regularly inspect and clean the machine to prevent dust buildup, which could lead to mechanical issues. Proper handling and storage will ensure safe and efficient sewing experiences.
Essential Parts of the Singer Sewing Machine
Understanding your Singer sewing machine begins with identifying its essential parts, such as the handwheel, presser foot, needle bar, bobbin area, and spool pins. These components ensure smooth operation.
2.1 Identifying the Major Components
Familiarizing yourself with the Singer sewing machine’s major components is crucial for effective use. Key parts include the handwheel, used for manual fabric control, and the presser foot, which holds fabric in place. The needle bar guides the needle’s movement, while the bobbin area manages the lower thread. Other essential components are the spool pins for thread, stitch selectors for pattern choices, and the reverse stitch button for reinforcing seams. Understanding these parts ensures proper machine operation and troubleshooting.
2.2 Understanding the Role of Each Accessory
Each Singer sewing machine accessory serves a specific purpose to enhance your sewing experience. The presser feet are essential for handling different fabrics and techniques, such as zipper, buttonhole, or walking feet. Bobbins store the lower thread and must be compatible with your machine model. Specialty needles, like denim or stretch needles, are designed for specific fabrics. Other accessories, such as seam rippers or edge guides, aid in precision and convenience. Using the right accessory ensures optimal performance and expands your creative possibilities. Always refer to the accessory chart in your manual for guidance.
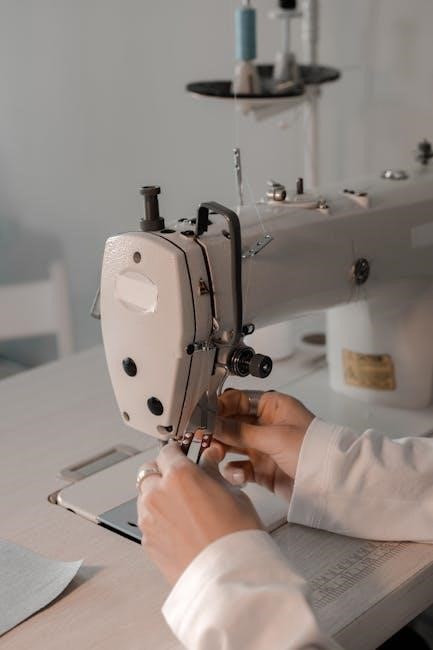
Threading the Singer Sewing Machine
Proper threading is crucial for smooth operation. Follow the guide to thread the upper thread and bobbin correctly, ensuring the machine runs efficiently and avoids common issues.
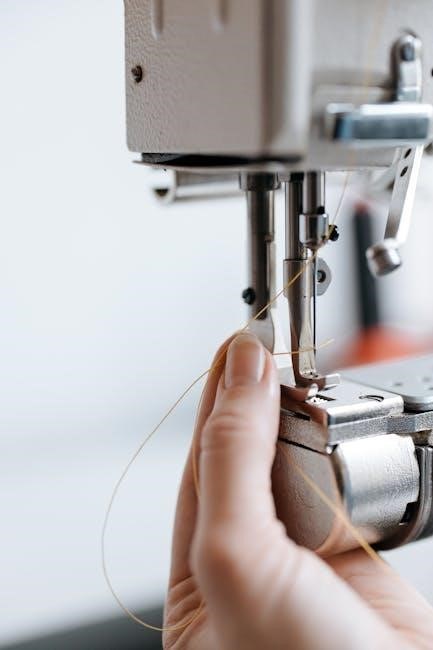
3.1 Step-by-Step Guide to Threading the Upper Thread
To thread the upper thread, start by placing the spool on the spool pin. Guide the thread through the tension discs, ensuring it clicks into place. Loop the thread around the take-up lever and insert it into the needle. Keep the presser foot raised during threading to avoid tension issues. Always follow the machine’s threading path for proper alignment. Incorrect threading can lead to uneven stitches or machine malfunction. Refer to your manual for specific diagrams. Proper threading ensures smooth operation and consistent stitch quality.
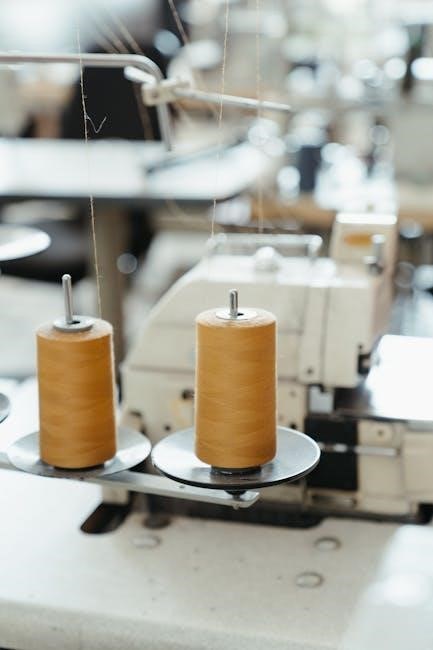
3.2 Proper Bobbin Threading Techniques
Properly threading the bobbin ensures smooth stitching. Start by winding the bobbin evenly, ensuring the thread isn’t tangled. Insert the bobbin into the bobbin case, making sure the thread exits through the notch. Pull the thread gently to seat it properly. Use the correct bobbin type for your machine, as specified in the manual. Guide the thread through the machine’s tension guides and pull it to test tautness. Incorrect bobbin threading can cause jams or uneven stitches. Always refer to your Singer machine’s guide for specific bobbin threading instructions to ensure optimal performance.
3.3 Common Threading Mistakes to Avoid
Common threading mistakes include incorrect thread tension, using the wrong bobbin type, and not raising the presser foot while threading. Ensure the thread is seated properly in the tension discs and guide it correctly through the machine. Avoid over-tightening or leaving the thread too loose, as this can cause uneven stitches or jams. Always refer to your Singer machine’s manual for specific threading instructions to prevent these issues and ensure smooth operation. Proper threading is essential for consistent stitching quality and machine performance.
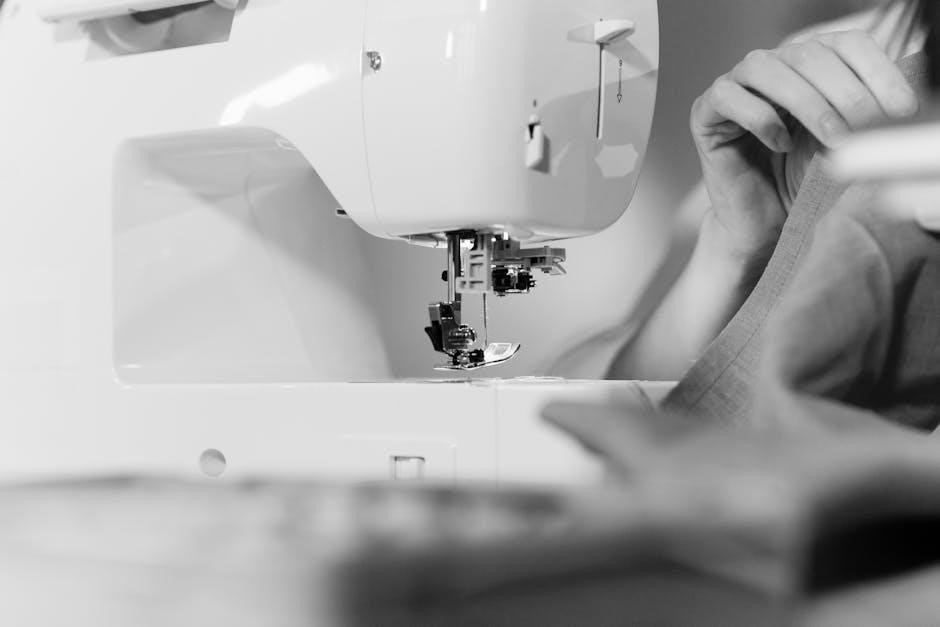
Basic Sewing Operations
Master essential sewing operations like selecting stitches, adjusting length, and using reverse. Learn to handle fabric smoothly and achieve professional results with Singer’s intuitive controls and features.
4.1 Selecting the Right Stitch for Your Fabric
Selecting the right stitch is crucial for successful sewing. For cotton and linen, use straight stitches. Choose zigzag for stretch fabrics and overlock for knits; Decorative stitches enhance projects. Always match stitches to fabric type for optimal results. Test on scrap fabric first. Proper stitch selection prevents fabric damage and ensures professional-looking seams. Refer to your Singer machine’s manual for stitch guide. Adjust settings for best outcomes. Happy sewing!
4.2 Adjusting Stitch Length and Width
Adjusting stitch length and width ensures optimal results for your fabric type. Use the stitch length dial to set between 0-4 for delicate fabrics and 4-6 for heavier materials. For width, choose narrower settings for straight lines and wider for decorative stitches. Always test on scrap fabric first. Proper adjustments prevent fabric stretching or puckering. Refer to your Singer machine’s manual for specific guidance. Adjusting these settings enhances stitch quality and ensures professional-looking results. Happy sewing!
4.3 Using the Reverse Stitch Function
The reverse stitch function is essential for securing seams. Engage it by pressing the reverse button, ensuring stitches are sewn in the opposite direction. This prevents fraying at seam ends. Use it at the beginning and end of your sewing for a professional finish. For thick fabrics, it reinforces the stitch line. Ensure the fabric remains stationary while reversing to avoid uneven stitches. Proper use enhances durability and prevents unraveling, especially for heavy-duty projects. Always test the function on scrap fabric first for optimal results.

Maintaining Your Singer Sewing Machine
Regular maintenance ensures your Singer sewing machine runs smoothly. Clean dust and debris, oil moving parts, and store it properly. This extends its lifespan and performance.
5.1 Cleaning the Machine Regularly
Cleaning your Singer sewing machine regularly is essential for optimal performance. Turn off and unplug the machine before starting. Use a soft brush to remove lint and debris from the bobbin area, tension discs, and stitch plate. Gently wipe down the exterior with a damp cloth, avoiding harsh chemicals. For stubborn dust, use compressed air. Regular cleaning prevents thread jams and ensures smooth stitching. Clean after every project or at least once a month for consistent results. Always refer to your manual for specific cleaning instructions.
5.2 Oiling the Machine for Smooth Operation
Regular oiling is crucial for maintaining your Singer sewing machine’s smooth operation. If your manual doesn’t specify oiling, your machine is pre-lubricated. For models requiring oil, apply 2-3 drops to the bobbin case and needle bar monthly or more frequently with heavy use. Avoid over-oiling, as it can attract dust. Use high-quality sewing machine oil only. Proper lubrication prevents friction and ensures consistent stitching. For optimal performance, have your machine serviced by a Singer technician every 3-4 years. Always refer to your manual for specific oiling instructions.
5.3 Storing the Machine Properly
Proper storage is essential to maintain your Singer sewing machine’s condition. Always clean the machine before storing it to prevent dust buildup. Use a soft cloth to wipe down surfaces and remove any residual thread. Store the machine in its original case or a protective cover to shield it from dust and moisture. Keep it in a cool, dry place away from direct sunlight and extreme temperatures. For added protection, store the machine upright to prevent oil from leaking. Regularly check stored machines to ensure they remain in good working condition.
Troubleshooting Common Issues
Identify and solve common problems like skipped stitches, thread tension issues, and bobbin jams. Learn quick fixes and maintenance tips to keep your machine running smoothly.
6.1 Why Your Machine Might Be Skipping Stitches
Skipped stitches can occur due to a dull or damaged needle, incorrect needle installation, or improper thread tension. Using the wrong needle type for your fabric or issues with machine timing can also cause this problem. Regularly inspect and replace needles, ensure proper threading, and check the needle’s alignment to resolve the issue. If the problem persists, consult a professional technician to address potential timing adjustments.
6.2 Resolving Thread Tension Problems
Thread tension issues can cause uneven stitching or fabric puckering. Check if the thread is properly seated in the tension discs and that the presser foot is raised during threading. Incorrect bobbin tension or misaligned threads can also disrupt stitching. Gently pull the thread to ensure it’s taut but not overly tight. If issues persist, re-thread the machine or adjust the tension dial. Testing the stitch on scrap fabric can help identify and resolve tension imbalances effectively.
6.3 Fixing Bobbin Jam Issues
Bobbin jams disrupt sewing and require immediate attention. To resolve, carefully remove the bobbin and check for tangled thread. Ensure the bobbin is correctly seated and aligned. If the issue persists, inspect the bobbin case for debris or damage. Clean thoroughly with a soft brush and reinsert the bobbin, ensuring it rotates smoothly. Always use the correct bobbin type for your machine, as mismatched sizes can cause jams. Proper threading and regular machine cleaning can prevent future bobbin-related problems, ensuring smooth sewing operations.
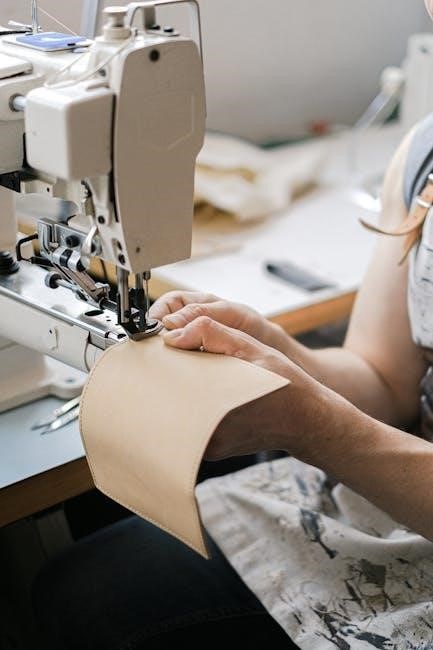
Sewing Heavy Fabrics and Denim
Master sewing heavy fabrics and denim with the right tools. Use a SINGER Denim Style 2026 needle and adjust stitch length for thickness. Optimize settings for durability and perfect seams.
7.1 Choosing the Right Needle and Thread
For heavy fabrics and denim, selecting the right needle and thread is crucial. Use a SINGER Denim Style 2026 needle for denim and size 16 or 18 needles for other heavy fabrics. All-purpose polyester thread works well for most fabrics, while cotton thread is ideal for quilting. Heavy-duty threads can cause tension issues, so use them sparingly. Always choose threads that match your fabric type for optimal results. Regularly change needles to maintain performance and prevent damage to your machine or fabric.
7.2 Adjusting Stitch Settings for Heavy Fabrics
For heavy fabrics like denim, use a straight stitch with a stitch length of 4-5. This accommodates the fabric’s thickness and prevents thread breakage. For other heavy fabrics, set the stitch length between 3-4 and maintain a moderate sewing speed to handle thick layers smoothly. Adjusting the stitch width may also be necessary depending on the fabric type. Ensure the presser foot is lowered and use the metal all-purpose foot for best results. Proper stitch settings ensure even stitching and prevent fabric bunching or distortion.
7.3 Tips for Sewing Thick Layers
When sewing thick layers, use a size 16 or 18 Singer needle for heavy fabrics. Set the stitch length between 3-4 and width appropriately for the fabric type. Use heavy-duty or topstitching thread for added strength. Engage the walking foot or Teflon foot to guide fabric smoothly. Sew at a moderate speed, especially over thick seams. Avoid pulling fabric forcefully, as this can cause misalignment. For multiple layers, pin them securely and sew gradually. These tips ensure even stitching and prevent fabric distortion when working with thick materials.
Advanced Sewing Techniques
Explore advanced sewing techniques to enhance your creativity. Master buttonhole sewing, stretch fabric handling, and decorative stitching. These techniques will elevate your sewing projects to the next level.
8.1 Mastering Buttonhole Sewing
Mastering buttonhole sewing is essential for creating professional-looking garments. Singer sewing machines offer automatic buttonhole features, making the process efficient. Start by selecting the buttonhole stitch and adjusting settings for size and alignment. Place your fabric under the needle, ensuring edges are aligned. Use stabilizing material if needed. Sew a test buttonhole on scrap fabric to confirm settings. For manual buttonholes, use a zigzag stitch and carefully guide the fabric. Always use the correct needle type for sharp, clean stitches. Practice on different fabrics to refine your technique. Refer to your machine’s manual for specific buttonhole settings and troubleshooting tips to ensure perfect results every time.
8.2 Sewing Stretch Fabrics Effectively
Sewing stretch fabrics requires the right techniques and tools. Use a ballpoint or stretch needle to prevent fabric damage. Select stretch stitches or zigzag stitches for optimal flexibility. Adjust the stitch length and width based on fabric thickness and desired elasticity. Use a walking foot or Teflon foot for smooth fabric handling. Stabilize the fabric with interfacing if needed. Always test settings on scrap fabric before sewing your final project. Proper thread tension is crucial to avoid puckering or fabric distortion. These tips ensure professional-looking results when working with stretch fabrics.
8.3 Creating Decorative Stitches
Enhance your projects with decorative stitches using your Singer sewing machine. Select from various built-in stitch patterns, such as floral, scroll, or geometric designs. Adjust stitch length and width to customize the look. Use stabilizing materials like interfacing or water-soluble topping for smooth results. Test stitches on scrap fabric before sewing to ensure proper tension and alignment. Experiment with contrasting threads for vibrant effects. Decorative stitches add a professional touch to garments, home decor, and crafting projects, making your creations truly unique and personalized.
Accessories and Attachments
Explore Singer sewing machine accessories like presser feet, specialty needles, and attachments. These tools enhance versatility, helping you tackle various fabrics and techniques with precision and efficiency.
9.1 Understanding the Different Presser Feet
Presser feet are essential attachments for your Singer sewing machine, each designed for specific tasks. The all-purpose foot is ideal for straight stitching, while the zipper foot handles zippers and thick seams. The walking foot is perfect for heavy fabrics like denim, ensuring even feeding. Other specialized feet include the blind hem foot for invisible hems and the satin stitch foot for decorative stitching. Using the right presser foot enhances stitching accuracy and versatility, making your sewing projects easier and more professional.
9.2 Using Specialty Needles for Optimal Results
Specialty needles enhance your sewing experience by catering to specific fabrics and techniques. Use a denim needle for thick fabrics like denim and canvas, while a ballpoint needle is ideal for stretchy materials. A stretch needle is perfect for knits and synthetic fabrics. Change needles every 6-8 hours of use to maintain sharpness and prevent fabric damage. Always opt for genuine Singer needles to ensure compatibility and optimal performance. This ensures precise stitching and prolongs your machine’s lifespan, delivering professional-quality results for every project.
9.3 Exploring Optional Accessories
Optional accessories can elevate your sewing experience. Consider adding a walking foot for thick fabrics, a quilting bar for even stitching, or an extension table for larger projects. Specialty presser feet, like the zipper or blind hem foot, expand your creative options. A carrying case protects your machine during storage or transport. Explore Singer’s accessory range to enhance your sewing capabilities and tailor your machine to your specific needs for optimal results and versatility in your projects.
Mastering your Singer sewing machine unlocks endless creative possibilities. For additional support, visit Singer’s official website for manuals, troubleshooting guides, and accessory information. Happy sewing!
10.1 Final Tips for Getting the Most Out of Your Machine
To maximize your Singer sewing machine’s performance, always use recommended needles, threads, and accessories. Regularly clean and oil the machine to ensure smooth operation. Experiment with stitch settings for different fabrics, and refer to Singer’s official guides for troubleshooting. For optimal results, maintain consistent thread tension and replace dull needles promptly. Explore Singer’s customer support and online resources for additional tips and updates. Happy sewing—your Singer machine is your gateway to endless creative possibilities!
10.2 Where to Find Additional User Manuals and Guides
For additional user manuals and guides, visit Singer’s official website at https://www.singer.com. Navigate to the “Manuals & Updates” section to download free PDF copies of user manuals, stitch guides, and machine updates. Older models, such as the Singer 15, 66, and 201, can be found at https://singerco.com.au/instruction-manuals/. Ensure to use your machine’s model number for precise searches. For further assistance, Singer’s customer support is available to provide tailored guidance and resources.
10.3 Accessing Singer Customer Support
To access Singer customer support, visit the official Singer website at https://www.singer.com. Navigate to the Singer Help Center, where you can find FAQs, troubleshooting guides, and contact information. Select your region to view localized support options. For assistance, ensure you have your machine’s model number ready. Singer customer support is available to address inquiries, repair needs, and provide technical guidance. You can also reach out via phone or email for personalized help with your Singer sewing machine.